To avoid poor results, it’s important to follow essential tips and consider important factors for painting an old house exterior. This is because these houses often need special attention.
In this blog, we’ll explain how to paint an old house exterior and cover all aspects of such projects. Although hiring professionals is usually best, you can DIY the project in less sensitive cases.
Why Old House Exteriors Need Special Care
Aged materials that have been exposed to the elements for years require special care and preparation before any surface treatment. Moreover, because they often have multiple paint layers, they’re likely more fragile and prone to moisture damage, peeling, and poor paint adhesion.
In particular, older wood siding and trim are more porous, so they need to be inspected carefully to spot and fix any issues before starting the painting project.
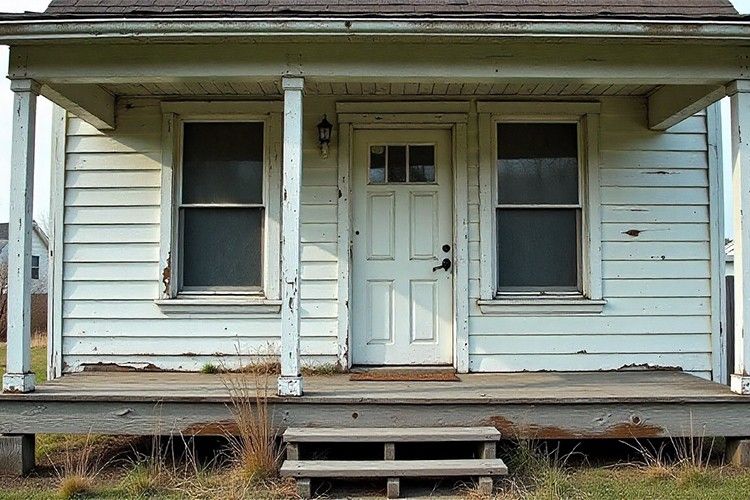
That is why owners of older properties can’t treat their exteriors like those of a newly built house, as they require more detailed, more careful prep to deliver long-lasting results. This foundation matters before learning how to paint an old house exterior.
Read more: “How Much Does House Painting Cost? (Comprehensive Overview)”
Essential Prep Work Before Painting an Old House Exterior
Preparing the exterior of an old house for painting involves four key steps.
1. Cleaning the Surface
Dirt, mildew, chalking, and loose debris that old siding and trim collect over time prevent proper paint adhesion and need to be removed. Therefore, thoroughly washing the surface is critical to create a clean, paint-ready base so the new coating bonds properly.
2. Scraping and Sanding
Peeling or uneven old paint is common in older exteriors. To remove loose layers and better prepare the surface, scraping is necessary. Additionally, our experienced painters recommend sanding in this stage to feather the edges and create a smooth, stable surface that reduces the risk of peeling.
Looking for Professional Painting Services?
Our experienced painters can deliver high-quality results, inside or out. If you’d rather let the pros manage your project, reach out to us today.
3. Inspecting and Repairing
Another vital part of prep for old house painting is identifying damaged wood, moisture issues, and failing trim. This is important because repairing rot, cracks, and warped boards confirms that the surface is ready for painting, thereby ensuring the paint adheres well.
4. Caulking and Sealing Seams
Trapped moisture is a major problem in older homes, which often have weaker or weathered materials. Addressing gaps around joints, windows, and trim with proper caulking will protect the wood and extend the lifespan of the finish.
Choosing the Right Primer and Paint for an Old Exterior
First, assess the surface condition and identify the material you’ll be working with. Bare wood always requires primer, especially where old paint has lifted. A priming coat helps seal the surface, even out absorption, and create a consistent base with good adhesion. The primer choice depends on the surface. For example, for bare wood or tannin-rich species, an oil-based primer is the best choice. A high-quality acrylic/latex primer works well for previously painted areas in good condition.
When choosing paint, paying the premium price and purchasing a high-quality product will ensure increased longevity. Note that in exterior painting projects, you must consider multiple environmental factors that can impact the coating over time.
However, if you’re tight on budget, you can go with lower-cost paint options but have to accept their weaknesses, such as being less moisture-resistant, more prone to UV damage, affected by temperature swings, and more susceptible to general weather exposure.
If you notice significant surface wear, it’s best to use a separate primer before applying the topcoat. This system is stronger than paint-and-primer combos. Keep in mind that your primary goal should be to use products that effectively protect aging surfaces, help prevent future peeling, and withstand harsh climates.
How to Paint an Old House Exterior? (Step-by-Step Guide)
Now, it’s time to break down the process and see how to paint an old house exterior.
Selecting Tools and Application Methods
Use rollers to cover flat areas and brushes for detailed trim and textured or grooved siding. This technique will speed up the work and help create an even finish on all exterior surfaces. If you’re experienced with professional tools, use sprayers for large areas. But be aware that misuse can lead to overspray and messy finishes, especially around old windows and delicate features.
Choosing the Proper Painting Method
Compared to interior painting, exterior painting is more challenging. It’s usually best to start at the top and work downward, cutting around windows, doors, and trim before moving on to the main siding. To avoid lap marks, apply thin, even coats and maintain a wet edge throughout the project. This helps each coat dry properly.
Final Coats and Finishing Details
Typically, older exteriors require at least two coats for solid coverage and durability. That said, you should inspect the surface after the first layer dries to identify missed spots, touch up any imperfections, and make sure trim, seams, and edges are clean and fully sealed.
Read more: “A Complete Guide on How to Paint Fiberglass Porch Columns”
Pro Tips For Achieving The Best Result
We asked our experienced painter for some advice on this topic, and these are the top tips that can help you improve your finish quality:
- Do the job in the right weather conditions, when the temperature is mild, and the humidity is manageable.
- If heavy sanding is needed, always test for lead paint and opt for safe removal methods.
- During the preparation phase, keep moisture levels low.
- Wherever old paint meets bare wood, feather-sand edges thoroughly.
- To achieve stronger coverage and complete the job with fewer coats, tint the primer to a shade close to the topcoat.
- Repair or replace severely damaged areas rather than painting over the problem to save time and prevent peeling in the near future.
- Let the first layer dry fully, and then apply the next coat for proper adhesion.
Move Forward With How to Paint an Old House Exterior
Up to this point, you have learned how to paint an old house exterior. However, it’s worth noting that these projects carry additional risks, so it’s better to hire professionals to ensure they go smoothly.
If you don’t want to take on the painting of an aged house yourself, our skilled painters at Roll the Wall are ready to take care of the work, using professional tools and proven methods. We can deliver a high-quality finish in a short time. Contact us and book an on-site evaluation of your project.
FAQ
Do I always need to scrape off all the old paint before repainting?
No, only the loose, peeling, or unstable paint must be removed. If the existing paint is firmly bonded, you can sand the edges smooth and paint over it. The key is to ensure every surface you keep is solid, clean, and ready to hold a new coat.
How do I know if the old paint is safe?
If the home was built decades ago, the old paint may contain lead and should be tested for lead. You can use an at-home test kit or hire a professional for confirmation. Lead paint requires specialized, safe removal methods to avoid health risks.
Can I use a sprayer on old wood siding/clapboard?
Yes, but only if the surface is properly prepped and masked, because sprayers can highlight imperfections on weathered wood. Many pros spray and then back-brush to push paint into the grain and achieve better coverage. This method works especially well for a clapboard that has an aged texture.
What if parts of the siding are rotted? Can I just paint over them?
Painting over rot will not stop the damage and usually leads to rapid paint failure. Rotted sections should be repaired or replaced before any painting begins. Proper restoration ensures the new paint adheres correctly and the exterior stays protected long term.
Tried painting an old house exterior on your own? Share what went smoothly and what you’d do differently in the future.
