In some cases, you can handle interior painting on your own. This way, you can save money by avoiding the cost of hiring professional painters. However, it’s crucial to know the basics of the painting process and use the right tools and materials to get the best results.
In this blog, we’ll show you how to paint a room properly with a clear, step-by-step guide. If you’re on a tight budget or prefer handling the job yourself for any other reason, the following information will help you.
Prepare the Room Before You Paint First
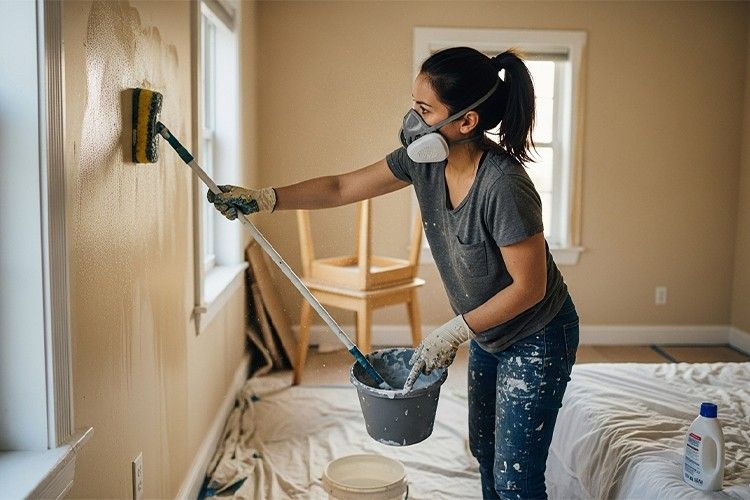
Remove as much furniture as possible. Move anything that you can’t take out of the room to the center and cover it with plastic sheeting to protect it from paint stains. Also, use canvas drop cloths to protect floors. Why canvas? Because it doesn’t slide, absorbs small spills, and is reusable. After that, mask trims, windows, outlets, and other fixed areas with high-quality painter’s tape.
When the room is fully prepared, clean all surfaces on walls and ceilings with a mild detergent solution or TSP substitute. This way, you can remove dust, grease, and residue to ensure proper paint adhesion. Any hardware attached to the walls, such as switch plates, outlet covers, curtain rods, and hooks, should be removed during prep.
Additionally, dents, nail holes, or cracks must be filled with spackling compound or patching mud. After filling, when the patched areas dry, sand them with fine-grit sandpaper to ensure a smooth surface. Our experienced painters also recommend lightly scuff-sanding glossy areas to make sure that the new paint bonds more effectively.
Read more: “A Complete Guide on How to Paint Fiberglass Porch Columns”
Choose the Right Tools, Paint, and Primer
If you want to know how to paint a room yourself, it’s good to know that the quality of your tools and materials directly affects the outcome. The chosen paint must suit the room’s requirements. A simple guideline is:
- Use matte or eggshell for living areas.
- Use satin or semi-gloss for kitchens, baths, and high-traffic areas.
Regardless of the paint type, it must be paired with the right primer. Professional painters use stain-blocking primers for previously smoked-in or water-stained rooms. Bonding primers are used for glossy surfaces, and basic drywall primers are best for new or patched walls.
The better the primer, the better the topcoat adheres, evening out the surface and improving the quality.
In addition to materials, tools also play a critical role in achieving a good finish. As an amateur, stick to brushes and rollers that won’t shed or leave streaks. Angled sash brushes deliver high accuracy, which makes them the best fit for cutting in around trim and corners.
Contact Us for Professional Painting Services
Want a flawless finish? Let our experienced painters handle the job. Get in touch for a quick assessment and professional service.
Roller naps help create even coverage, especially for beginners. However, they come in various types, and you should know which one is good for your specific needs. 3/8-inch performs best for smooth walls, while 1/2-inch is a better choice for lightly textured surfaces. For heavier textures, including surfaces like a fluted column, thicker naps work better.
As mentioned earlier, you’ll need premium painter’s tape that seals well and won’t pull off paint when removed. Moreover, canvas drop cloths, paint trays, or bucket grids are essential supplies for an interior painting job.
Pick Your Color and Finish
In this part of the guide on how to paint a room, we’ll discuss selecting the best color and finish. These two factors not only affect aesthetics but also determine how well the paint performs over time. Always test the color you’re considering in your space before committing. This way, you can ensure the color perfectly matches the room and looks good under various lighting conditions.
Equally important is selecting the correct paint sheen based on the room’s purpose and traffic level. Flat or matte finishes hide imperfections, but they don’t clean easily. That said, they perform better in low-traffic living areas or on ceilings.
Eggshell and satin deliver a balanced blend of softness and durability, making them suitable for bedrooms, hallways, and common areas. For kitchens, bathrooms, trim, and doors, it’s best to go with semi-gloss and gloss finishes, since they’re moisture-resistant and highly durable.
It’s worth noting that the sheen will influence how smooth the finish looks, how easy it is to clean, and how much surface texture becomes visible once the paint dries. Therefore, invest in a high-quality finish to achieve the expected results.
Begin the Painting
To paint like a pro, follow these steps precisely as instructed.
Step 1: Follow the Right Order of Operations
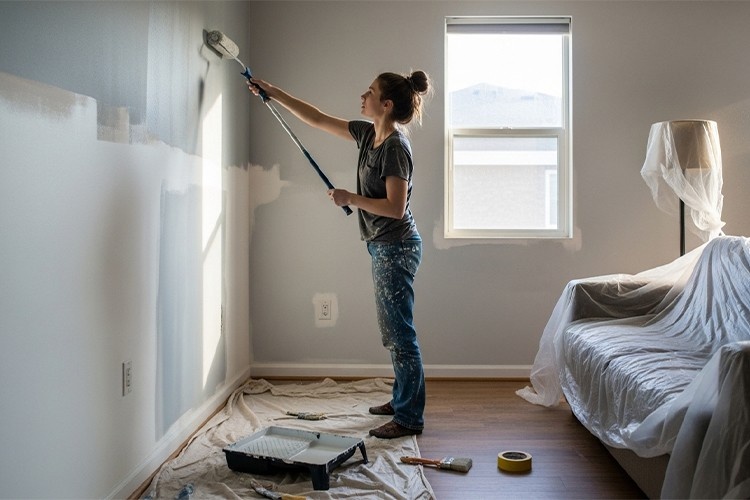
Skilled painters always work from top to bottom. You should do the same to avoid splatter ruining freshly painted areas. Simply put, start with the ceiling and, once it is dry, move on to the walls. Don’t rush. Work only on one section at a time. At the end, paint trim, doors, and baseboards.
Step 2: Use Proper Technique
Begin each wall by “cutting in” the edges. As noted above, angled brushes are the best tools to paint corners, trim, and the ceiling line where rollers can’t reach. Immediately after cutting in, use the roller to fill in the large areas before the brushed edges dry. Using this technique, you can evenly blend everything.
Another effective method for beginners is to roll in a large “W” or “M” pattern to spread the paint without pressing hard on the roller. Afterward, you should fill in the gaps with smooth, overlapping strokes. This is how you prevent streaks, roller marks, and patchy spots, all of which lead to a poor finish.
Step 3: Apply the Second Coat and Check for Coverage
Almost all rooms need at least two coats for proper coverage. This is especially important when covering dark colors, new drywall, or patched areas. Therefore, whenever the first coat dries completely, apply the second coat in the same way.
To check whether you need another coat, inspect the surfaces from various angles after they’re fully dried. Check them under both natural and artificial light to spot any thin spots, missed spots, or uneven sheen. If needed, apply another coat, or at least touch up the imperfect areas.
Final Touches and Clean-Up for a Professional Finish
At this stage, you have learned how to paint a room as a beginner with little or no experience. To finalize the project like a pro, do the following:
- Remove painter’s tape when the paint is still slightly damp to avoid tearing, peeling, or leaving jagged edges. Pull it back at a 45-degree angle.
- Reinstall hardware and fixtures after the paint has fully dried.
- Open windows or run fans to ventilate the room well, helping the paint cure more evenly and more quickly.
- Inspect the painted surfaces and do small touch-ups to clean up any imperfections.
- If you have used latex paint, wash brushes and rollers after the job. If they’re worn out, dispose of them responsibly, as they’re no longer useful.
That’s it. You managed to paint the interior space on your own, without hiring professional painters, and now you can enjoy the refreshed space of your home, after fully cleaning the area.
How to Paint a Room and Get Expert Help When You Need it
Now you know how to paint a room and understand the fundamentals of painting. Throughout this guide, we explored the key parts of a painting project and taught you how to prepare the area, select the right materials and tools, choose the proper color and finish, and apply paint to walls, ceilings, and other areas. We also discussed post-painting tasks to complete the job the right way.
Unlike exterior painting, DIY is possible for indoor spaces, without compromising your safety. However, if you want a guaranteed high-quality outcome, it’s always best to ask for professional help. Our team of expert painters at Roll the Wall has years of experience painting various surfaces and is ready to take on your project. If you want a premium finish or don’t want to deal with DIY challenges, contact us today for a thorough inspection of your space.
FAQ
How many coats of paint do I need for a typical room?
Most rooms need two coats of paint to achieve even colour and proper coverage. One coat often leaves patchy areas, especially on previously painted or repaired walls. Dark colours, stains, or new drywall may require an additional coat.
What’s the best sheen for interior walls?
Eggshell and satin are the most popular choices because they balance washability with a smooth, subtle finish. These sheens work well for living rooms, bedrooms, and hallways. High-traffic or moisture-prone areas may benefit from a semi-gloss finish.
Should I prime before every paint job?
Primer isn’t required for every project, but it’s essential when painting over dark colours, stains, glossy surfaces, or fresh drywall. It improves adhesion and helps the topcoat look more consistent. Skipping primer in those situations can lead to uneven sheen and poor coverage.
Can I paint the ceiling and walls with the same color?
It’s absolutely possible, and using the same colour can make a room feel larger and more cohesive. Just make sure to use a flat sheen on the ceiling to hide imperfections. Matching tones works especially well in small rooms or modern, minimalist spaces.
Have you tried painting a room on your own? Tell us what worked well for you and what you’d do differently next time.
